Ah the perennial go-to for lunch, for the working crowd in CBD. It serves up many hearty meals, from morning breakfasts to satisfying lunches, even managing a decent cuppa. After all that, it transforms into a cocktail bar come nighttime. Free the Robot manages a pleasant, cozy ambience should you arrive before the lunch hour rush.
Said decent cuppa.
Salmon bowl with onsen egg, avocado and acar, it is wholesome, healthy and filling. The salmon is smoked, so beware if you’re not a smoked salmon fan. Otherwise this is a perfectly acceptable, even delicious, lunchtime meal.
Chicken and avocado sandwich. Tender slices of chicken, sandwiched with cheese and creamy slabs of avocado and slathered with pesto sauce. Griddled to perfection. Great combination of flavours.
I regret not taking a proper photo of their burgers, but this might be the only way to showcase the juiciness of their patties. Very good execution, sufficient sauce and topped with a fried egg. It is difficult to find decent burgers in Singapore, and thankfully this ticks the right boxes.
My absolute favourite however, is the crab pasta. Generous chunks of crab cooked in a fragrant tomato base sauce, topped with pine nuts and chives. I could eat this every week (every day would be a stretch for anyone!). It is also a tad spicy, which ties all the flavours together in a neat little bow. Lovely.
This is comfort eating; foods that we are all familiar with, with a dash of inspiration. Affordable eats to soothe the stress of the work day.
Free the Robot
118 Telok Ayer Street Singapore 068587 (Telok Ayer MRT)
Opening Hours: 8.30am – 4.30pm (Tues-Sat, closed Mon and Sun)
After two long years my books are finally done and dusted. I’ve compiled two books, the first Myhumblefood book concentrates on Asian home cooking. The second book is a little more fun; along with some Western home cooking, I’ve also added a section on Food Art which is something I really enjoy. They’re both priced at RM 300 a set for people residing in Malaysia, or SGD 120 a set for those in Singapore.
Free delivery for those in Bangsar and Damansara Heights only.
Please PM me for details!
Special note: 50% of gross profit from the sale of the books will be donated to the National Kidney Foundation as well as the Great Heart Charity Foundation. Should you decide to also donate in addition to buying the book(s), 100% of your donation will go directly to these causes.
Thank you all very much for your love and support!
This is one super easy and delicious don! (don = rice bowl dish in Japanese). All you need to actually cook is the rice. The rest is all about slicing up the sashimi and avocado and assembling the rice bowl. Since the current trend now is all about clean eats, clean foods and healthy eating, I suppose this makes the cut (if you ignore the ubiquitous mayonnaise blobs popping up among the luscious chunks of creamy avocado and fresh maguro). Ingredients (for 1 person)
100 grams sashimi grade maguro tuna
1/2 ripe avocado, pitted and skinned
Mayonnaise – amount at your discretion, I used Japanese mayonnaise
Cooked short-grain white rice
2-3 tsp soy sauce depending how seasoned you like your tuna
Optional (for garnish) – chopped chives, seaweed flakes and thinly sliced leeks (only the white parts). I would highly recommend you add these as they add texture, lots of flavour and freshness to the dish
Optional – furikake (a type of Japanese rice topping/seasoning)
Method
Slice up the maguro sashimi into thick chunks, I cut mine into 3/4 inch cubes but do it however you like.
Season the maguro with soy sauce and set aside.
Cut up the avocado into cubes/chunks roughly the same size as the maguro.
Place the rice in a bowl (if you’ve opted for the furikake, mix it into the rice before arranging the rice in the bowl) and pile the maguro and avocado on top.
Squeeze mayonnaise over the dish in zig-zag lashings or you can add them in blobs like I did.
Add the ikura and garnish with chives, seaweed flakes and sliced leeks.
Serve
I enjoyed it so much I had it again for the next meal… only in the sloppiest, most disgusting way one eats when alone:- Still tasted amazing nonetheless!
Just another quick picture post on some scrambled eggs I made while I was in London. Found some black truffle at Borough Market, so I shaved some over the eggs. I still think nothing beats the aroma of Alba winter white truffles!
A minute twist to ordinary scrambled eggs… add some truffle oil and mild cheddar cheese shavings to give boring ol scrambled eggs a little kick! Top with chopped chives and serve over slices of sourdough bread, pan toasted in butter. Recipe for the basic scrambled eggs here.
On a recent trip to Hokkaido, I finally got to try sukiyaki. It’s a pretty commonplace dish, one that I’ve never tried because most of the time sukiyaki tends to be a quintessential beef hotpot dish. I don’t eat beef so I could never have it. In Hokkaido however, I found a sukiyaki place that offers the pork option. After cooking the pork in the sauce and dipping it in raw egg, I fell immediately in love with sukiyaki.
Many cooking videos and recipes later I discovered that there are two main types of sukiyaki; kansai style sukiyaki and kanto style sukiyaki. Kansai style sukiyaki calls for the method of frying the meat in some rendered fat and sugar before adding the sauce and the rest of the ingredients to the pot. Kanto style is where the sauce, called warishita (割り下), is prepared beforehand and everything is thrown in. This is what I am more familiar with. Normal chinese hotpot sessions normally have large boiling tubs of soup with various vegetables, fishballs and meat thrown in. I guess sukiyaki is a little more special as it seems to be geared towards good cuts of meat. It is also sweet and savory making the cooked meat perfect with a bowl of white rice.
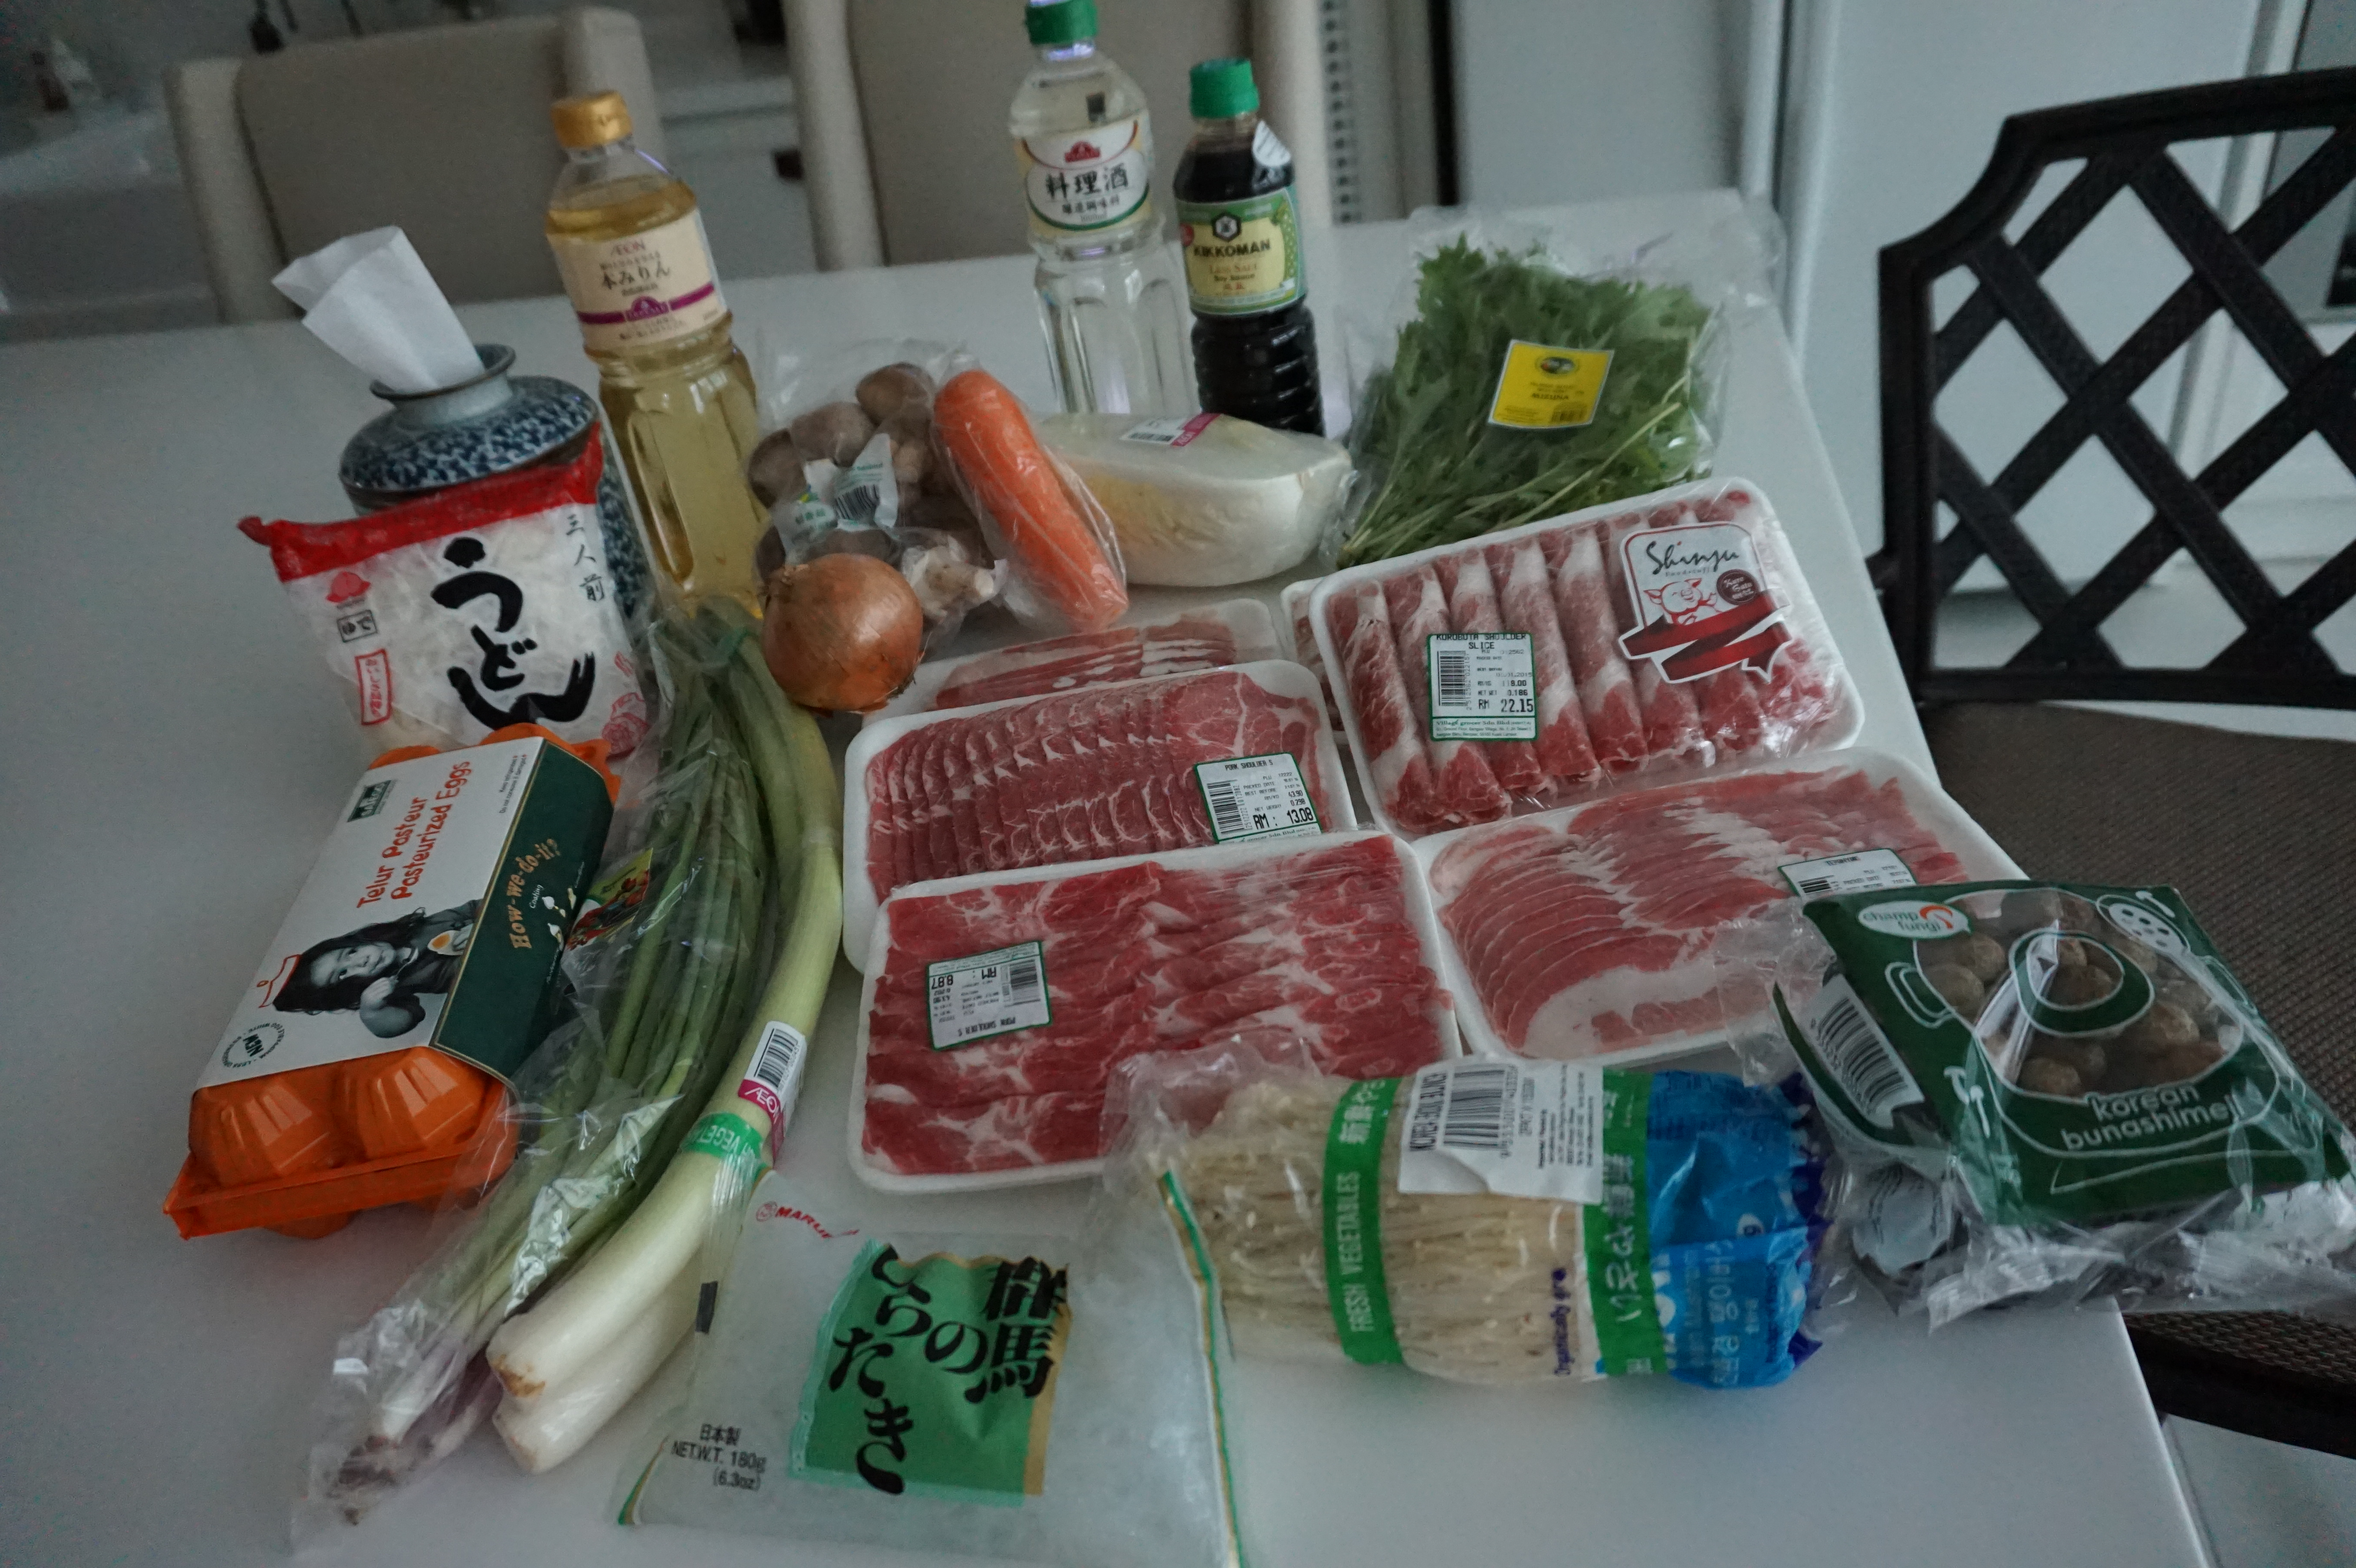
I was initially worried about the idea of using raw egg back here in Malaysia. Salmonella and all. Then I discovered that pasteurized eggs are safe for raw consumption as they eliminate risk of Salmonella and Avian flu virus. Make sure you do your research before buying and consuming raw eggs in any circumstance! I bought mine from safeegg at Aeon:-
3/4 cup sugar and 1-2 tbsps extra sugar in case you want it sweeter (*edit* I used less sugar and found it so much better, around 2/3 cup. I’d recommend 2/3 cup of sugar rather than 3/4 cup as it is less cloying and enhances the taste of the ingredients better)
1.5 cups light soy sauce (I got the low sodium Kikkoman soy sauce, which is why I still had to add a little salt afterwards; it wasn’t salty enough ;p)
2 tsp salt
4.5 cups water
Other ingredients
1.5 kg of sliced meat (I got some sliced pork belly, pork shoulder and even managed to get some kurobuta meat)
1 leek
4 stalks of spring onion
6 pasteurized eggs
1 carrot
1 large onion
1 pack firm tofu
1 pack enoji mushroom
10-12 fresh shiitake mushrooms
1 pack other mushrooms (whichever you like)
Shungiku leaves – I couldn’t find these so I used mizuna. You can use any other preferred leafy vegetables
1/2 chinese cabbage
Udon (I used 3 packets but since we also had rice we couldn’t finish all the udon. Cook as much as you think you need)
For sukiyaki it would be sufficient if you had a multi-purpose cooker placed in the center of the table so as to cook all the food as you eat. I do NOT think it is a good idea to throw in all the ingredients and cook it in the kitchen and brought over to the table. It pretty much defeats the purpose of sukiyaki and more often than not your ingredients will be overcooked and will lack the “freshly cooked” taste to it. I used a cast iron pot with sides high enough so that I can fit all the vegetables comfortably, as well as a hot plate.
Cooking Instructions
Wash all the vegetables and mushrooms.
Cut off the roots of the spring onions and cut the spring onions into 3 sections.
Cut off the roots of the enoki mushrooms and separate them
Cut off the stems of the shiitake mushrooms and create star shape patterns onto the cap of the mushrooms
It’s also a good idea to arrange the vegetables in large plates as you go along. Presentation is always important in Japanese cuisine!
Slice the carrot thickly
Slice onion
Cut the chinese cabbage into bite sized pieces
Pour a tablespoon of oil into a frying pan and fry/sear the surface of the tofu. What we are making here is yaki-dofu or grilled tofu. This is a good step-by-step on how to make it:http://japanese-kitchen.net/yaki-dofu-grilled-tofu/
Once you’re done searing the tofu, cut it into bite sized pieces
Tadahhh! All that effort of cleaning and cutting those vegetables! Not to mention searing tofu. I accidentally broke off some of the edges T___T
Prepare the udon according to instructions and set aside
Drain the shirataki and set aside
Next, combine all the wareshita ingredients in the pot and simmer to dissolve sugar.
Prepare all the meat and have it on standby with the vegetables.
Start the sukiyaki feast!
Place your pot on the hot plate and bring the sauce to a simmer. Cook the meat, dip into raw beaten egg and eat with fresh white rice. Throw the ingredients in according to your preference but I’d suggest putting in the leeks, onions and carrots first along with the meat as it lends more sweetness to the sauce. Not that it matters much, the sauce is already sweet enough, it’s just that these vegetables also take more time to cook. Enjoy!!
The above picture is from my 2nd attempt at making tamagoyaki. Its a pretty common food in Japanese and Korean cuisine. Perhaps the only difference is that the Koreans don’t make it with sugar, dashi or sake. Of course, the Japanese tamagoyaki has both sweet and savory versions but I prefer the sweet version. While it is helpful to have a rectangular pan for this recipe, it is not necessary. You can make tamagoyaki using a normal frying pan.
For my first attempt, I made tamagoyaki using only 3 eggs and using a low fire. Not only did I have to wait a longer time for the egg to cook, but the egg roll came out kinda small, flat and not as fluffy. It was worse when it got cold and shrank further in size T___T. I poured in only enough egg to cover the surface for the first round but this was a mistake in my opinion.
In my 2nd attempt, I used 5 eggs on medium-high heat in a smaller and deeper frying pan. I poured in half the eggs for the first round of cooking and that made the egg roll fluffier. The end result? Thick egg rolls!!! ❤
Other than that generally the cooking methodology is still similar, which is why I’m including my first attempt here as well.
Ingredients
5 eggs
1-1.5 tbsp sugar
5 tbsp water or dashi
1 tsp salt (more or less depending on how salty the dashi is)
1 tsp mirin
1 tsp sake
You will need some kitchen paper for oiling the pan after each round of frying as well.
Instructions
Combine the dashi/water, sugar, mirin, salt and sake into a bowl. Mix thoroughly.
Break the eggs into the bowl with the dashi mixture and beat to just combine but do not overly beat it as we want some egg white bits in the tamagoyaki. Run a chopstick a few times through the mixture to ensure that the eggs are broken up and can be poured easily.
Keep a bowl of oil with kitchen towel next to the pan. You will use this to continuously oil the pan after each round of cooking.
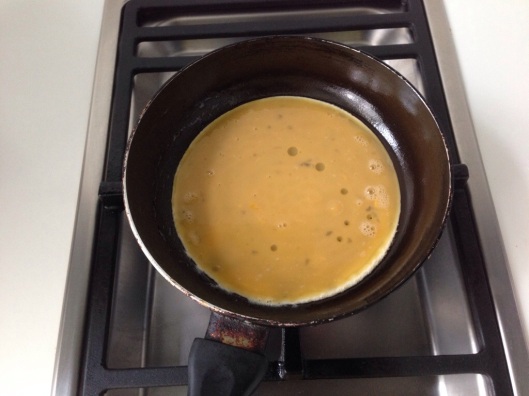
Oil the pan and heat it up on medium-high flame.
Pour in half the eggs.
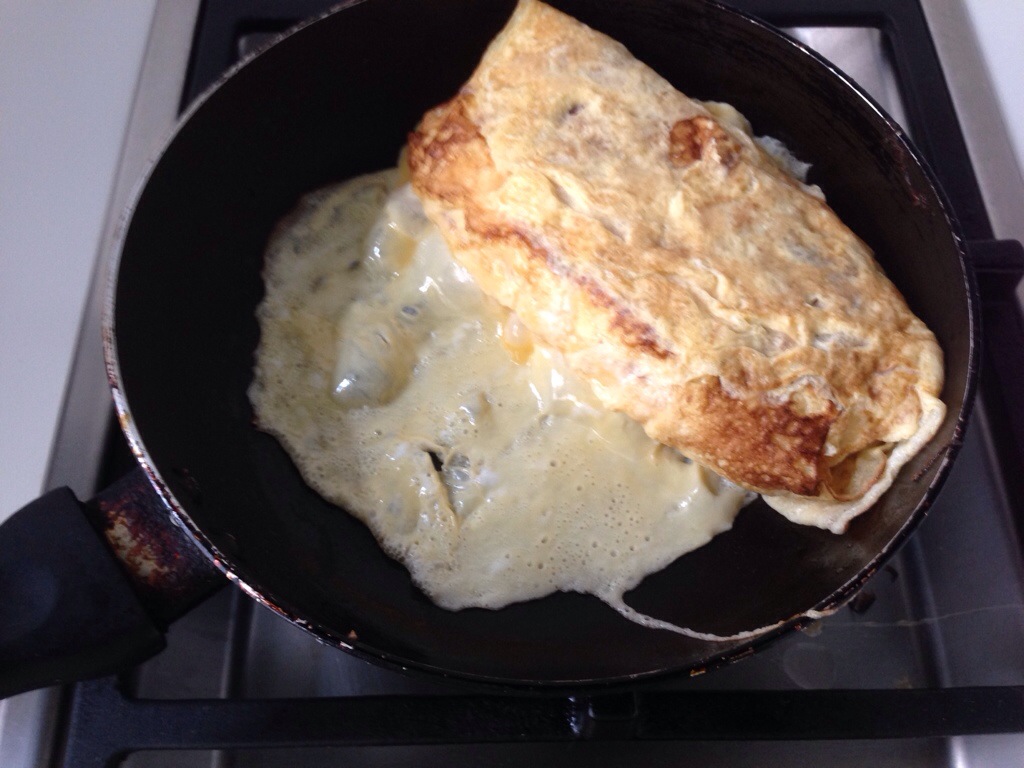
Scramble it a little. Fold over when the bottom is set enough to flip it over. Oil the exposed side of the pan, and then gently push the “omelette” to the side of the pan. Oil the rest of the pan before adding more egg. This time add just enough egg to cover the pan.
Above, I’ve already pushed the first layer of egg to the side and added the 2nd thinner layer. Lift the first “Omelette” so that the second layer of egg goes underneath to coat the entire pan. See those bubbles forming? Pop them!
Hehehe! Once this layer is more or less set, flip the thicker part onto the thin layer. This would create the “roll” layer. Again, oil the exposed part of the pan, push the egg to that side and oil the rest of the pan. Then add another layer of egg. Continue the process until all the egg is used up.
The last bit of egg… and you’re done! Brown the outsides if you like but don’t overdo it. If you want to shape the tamagoyaki into something more rectangular/oval you can make use of a sushi mat, but you have to shape it when it’s still hot.
Lastly, slice the tamagoyaki and serve 😉
I did not shape the tamagoyaki so the shape of it has a mind of its own T___T
I’m also going to add pictures from my first attempt. You can see that the heat is lower and the pan is bigger. So I “rolled” the egg several times and pushed the egg to the middle instead of the very end.
Waiting for the egg to cook before flipping the roll towards the left.
Above, after pushing the roll to the middle, I added another layer of egg.
Continue the process…
Finally done.
Now to cut it!
As you can see, the roll isn’t very thick. Also, it shrank after it cooled and wasn’t as fluffy. Which is why I prefer the first method of cooking on medium high heat and in a smaller pan. Cooking half the eggs and scrambling them in the first round saves time and also makes the eggs fluffy. So try it yourself and see which way works well for you.
I’ll leave you with some youtube links on making tamagoyaki :-
Just a quick post on what I made for dinner the other day when my family came over to Singapore. Typical food that you’d get in a Malaysian/Singaporean home.
Steamed fish, tofu with minced pork, fried egg onion omelette, stir fried vegetables and something that veers towards Japanese cuisine, the fried pork cutlets and prawns (Tonkatsu and ebi furai).
My kitchen, with the deep fried tonkatsu on a cooling rack and the ebi fry bubbling in the hot oil.
Beautifully golden ebi fry. My first attempt at it, will put up posts on how to make the tonkatsu and the ebi fry. Both dishes use almost the same method of preparation and cooking though 😉
Whoops, this picture came out sideways. This is the tofu dish, but I think I went overboard with the minced pork topping. May need to put up a proper post on this dish too. It goes amazingly well with rice and healthy to boot.
Steamed barramundi fish with lots of spring onions and chinese parsley (cilantro).
Yes I know the picture above makes this post seem like it is about pot stickers instead of eggplant. I’m saving that post for another day. Today it is just the eggplant.
Ingredients
1 fat eggplant, sliced into equal thickness (around 0.5 – 0.7 cm would be good)
1 egg, beaten and seasoned with a pinch of salt and white pepper. If you like you can also drop a couple of drops of truffle oil into the egg mixture
2 tbsps Olive oil for frying
Instructions
1) Heat up the oil in a frying pan on medium high heat
2) Coat each side of the eggplant slices with egg before placing them in the pan.
3) Fry until the bottom down side of the eggplant slices turn golden brown, before flipping it to fry the other side
4) Pat off the excess oil or place the fried eggplant onto some paper towels.
This is one of those quick fixes that can be done with just cooked rice and an egg. The other ingredients are cupboard ingredients (those that can be stored for a really long time), which is the beauty of this dish really.
If you’ve heard of the nabe (hot pots) that Japanese really love, you’d have also heard of them adding rice into the leftover stock once they’re done cooking the rest of the food. They then turn the rice into porridge, and thus, nothing is wasted.
And it is really delicious! I tried this “zosui” (the Japanese refer to thick rice porridge as zosui/okayu) in Hokkaido after a delicious kani-nabe ( I did NOT just swear at you lol!). Kani means crab, so what we had after the crab hotpot was some delicious stock. The waitress added more stock to it and then added precooked rice and let it simmer for a while before adding egg. It was the best porridge I’ve had!
I try to replicate it here the best I can without such expensive ingredients, crabs don’t come cheap in Singapore. I’ve come pretty close to it I think.
Ingredients (For 2 pax, or 1 hungry person)
1 cup cooked rice
1 egg, beaten
1/4 cup dashi (this is the second bottle from the left) – you can make it yourself, using konbu, anchovies and soy sauce but I found this more convenient
1 cup water
1 tbsp mirin
1 tbsp sake/cooking wine
Handful of chopped spring onions for topping
Handful of seaweed (nori) strips for topping
Cooking Instructions
Pour the dashi, water, mirin and wine into a pot and bring to a simmer.
Add the rice and cover the pot with a lid. Simmer on medium high heat until the rice softens. If you prefer really soft rice in the porridge, you could simmer it a little longer, just add some water so it doesnt dry up and stick to the bottom of the pot.
Once you’ve reached your desired consistency, turn off the heat and pour the egg into the centre of the porridge.
Work quickly and use the bottom of a ladle to stir the egg round and round until the egg is completely incorporated into the porridge.
You want the end result to look creamy. This is the end result of stirring the egg well. If you let the egg cook before you stir it in, it is going to look like an egg drop soup. Not like it tastes bad either, it just will not be as creamy as the picture below.
So the egg has to be quickly stirred in, in circles starting from the centre of the pot. If you were to stir it any way you wanted, the egg may end up streaky -___-
Then ladle it into a bowl and top with spring onions and seaweed.
So there it is, creamy Japanese porridge (obviously with zero dairy in it).
I love spring onions so I went overboard with it ;p
Edit: Just updated the post with a couple of photos from the slr. Thought it would look a little nicer 😉
I’m really really behind on my posts! I’ve got sooooo much to blog about, but have been too busy travelling the past month.
Now to complete this post!
As always for seaweed art in bento making, you need the cutting board, cutter for intricate designs, a piece of paper, binding clips, paper, a slice of cheese, a large sheet of seaweed, a pencil, a pair of small sharp scissors and tweezers.
Firstly trace out the shape of your bento box onto the piece of paper. Then and only then do you start drawing/sketching your favorite character within the drawn boundaries. Something not too complicated, with simple and clear lines would be good. Otherwise you’d be snipping the life out of the seaweed!
Another tip. Try not to handle the seaweed with your bare hands as much as you can. The heat and moisture from your fingers will cause the seaweed to go limp and difficult to manage. Use the tweezers instead.
Once you’re done with the drawing, place the drawing on top of the seaweed and clip both drawing and seaweed to the cutting board. To ensure that the drawing doesnt move around while you’re cutting, ensure that the drawing is as close to the clipped area as possible. If you’ve left a lot of space between the drawing and the binding clips, it will make cutting a whole lot more difficult as the seaweed and paper are more prone to moving about and tearing.
Start cutting out the white bits! Start by cutting out the small white bits first. Once you’re done with the little tricky bits, you can then cut out the larger white bits.
Here I’ve cut off the larger bit after completing the smaller parts. Of course, I couldn’t perfectly cut everything. I accidentally cut off the eye area but that’s ok. I can use another piece of seaweed to create another eye.
For the thinner lines such as the hair and the scar, it would be better to use the scissors rather than try to attempt to cut out fine lines using the cutter.
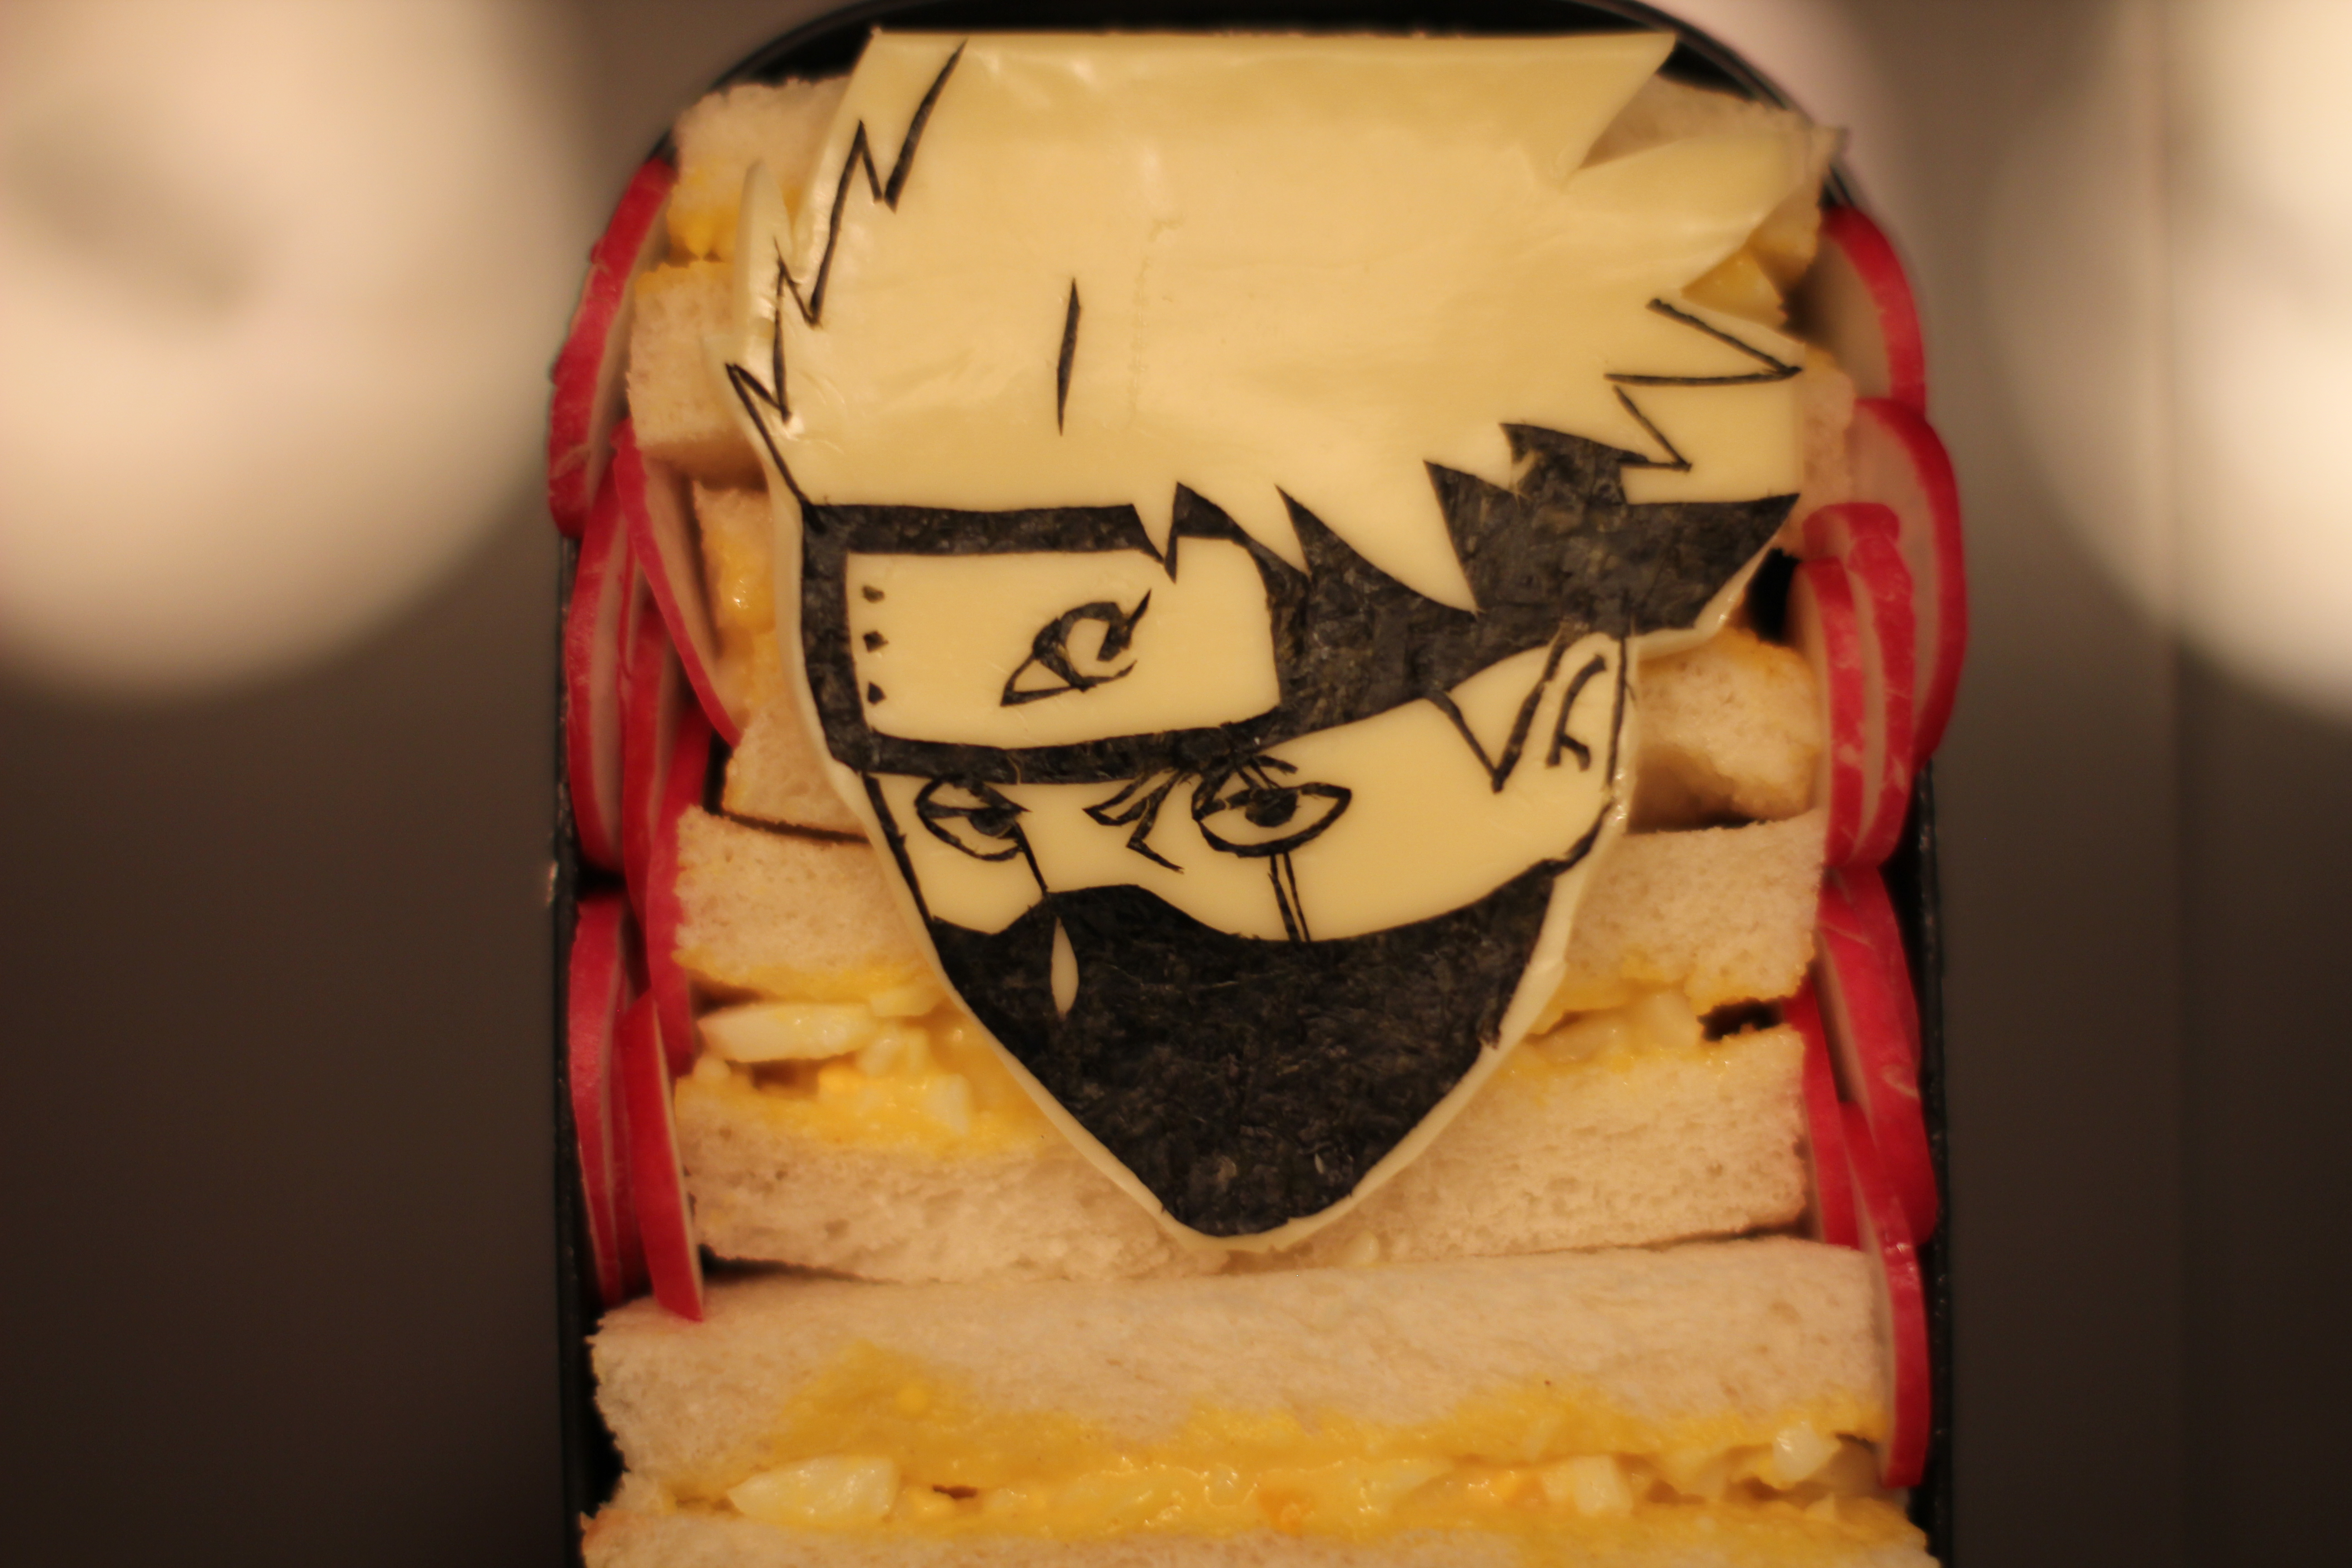
Fix on the thinner strips of seaweed onto the cheese to complete the character.
Lastly, trim the cheese if you prefer, and place as a decoration on top of your completed bento. I shan’t show my actual bento here because it was sloppy and simple. Just egg sandwiches that night.
Hopefully in my next bento attempt I’ll create something nice and cute! Something perhaps a little different from seaweed art.